Output store - Google
How to set up Google Cloud Storage as output storage in Telestream Cloud
Google Cloud Storage is reliable object storage with global edge-caching and instant data access. Data (objects) stored in GCS buckets belong to a project which consists of a set of users, a set of APIs, billing, authentication, and monitoring settings for those APIs.
Create a Project and GCS bucket
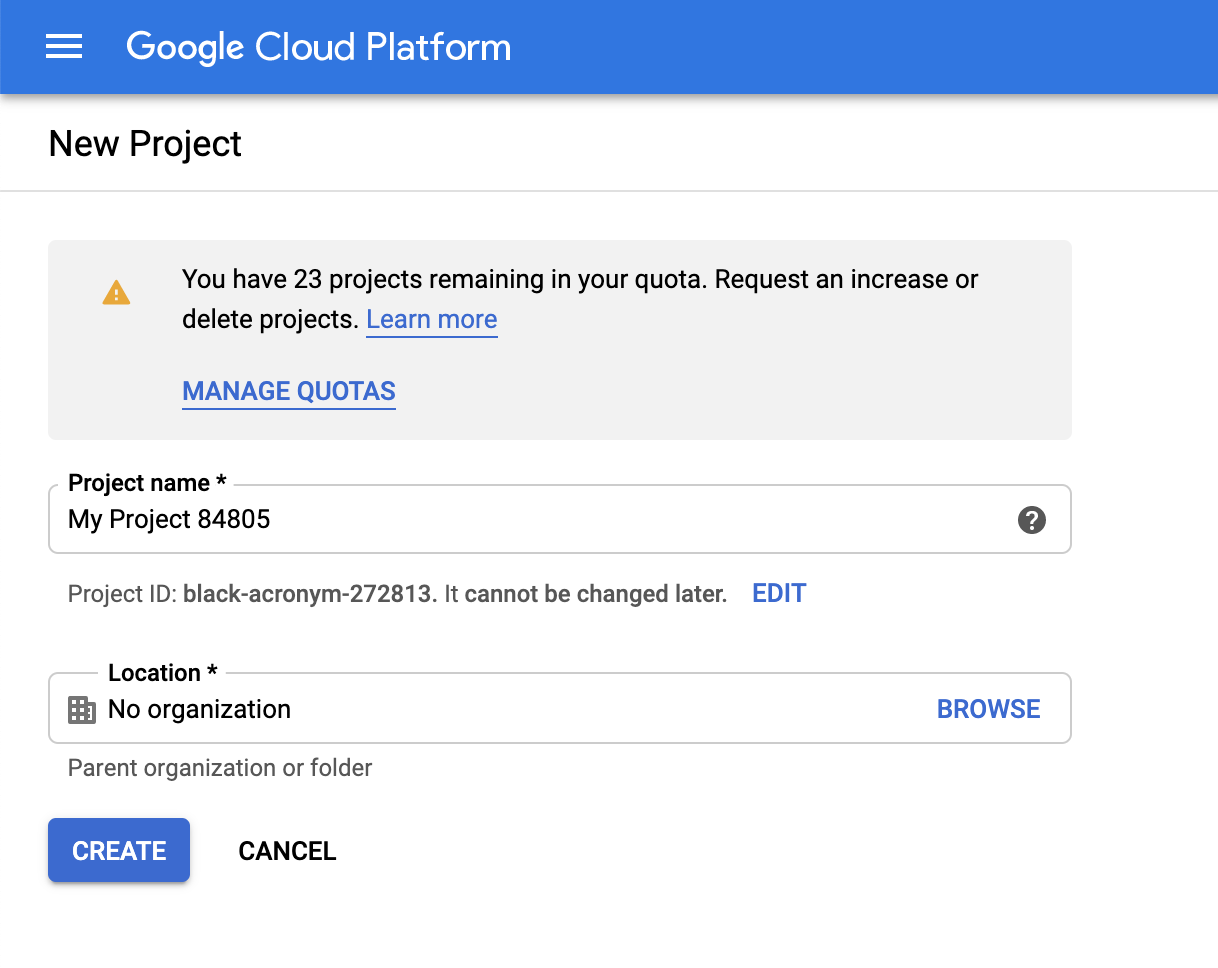
If you have an account with Google Cloud, log-in to your account and either [create a project for Telestream Cloud](go to https://console.cloud.google.com/projectcreate) or pick one of your existing projects.
Now it time to create a bucket within the project to store your data. From the side menu pick Storage > Browser.
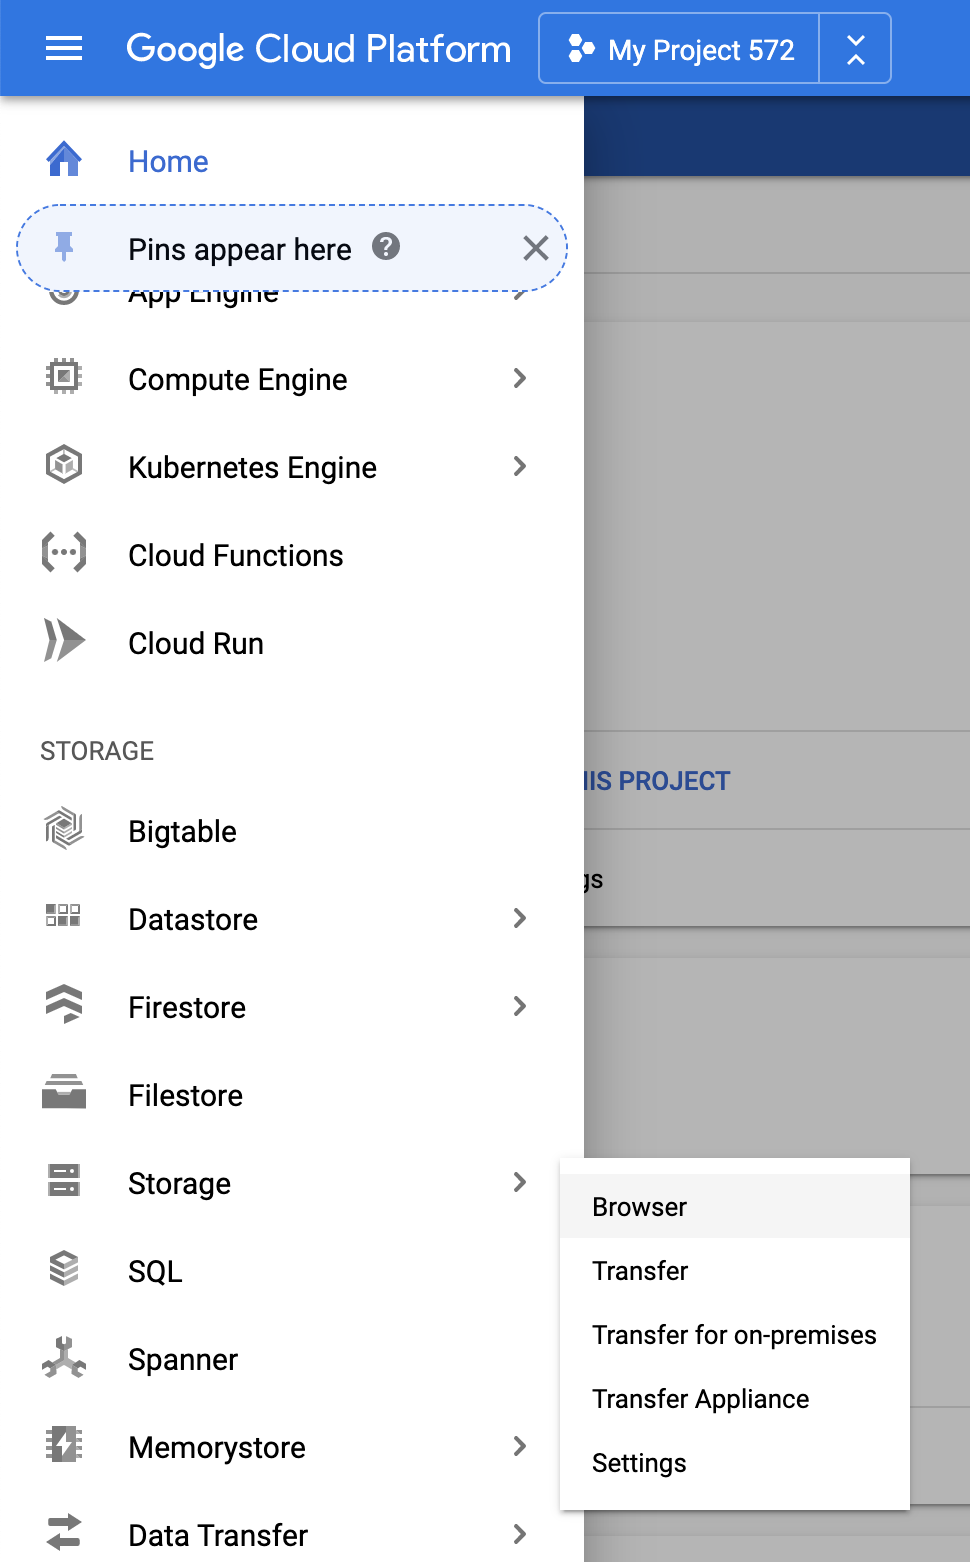
Click "Create Bucket" and follow the instructions.
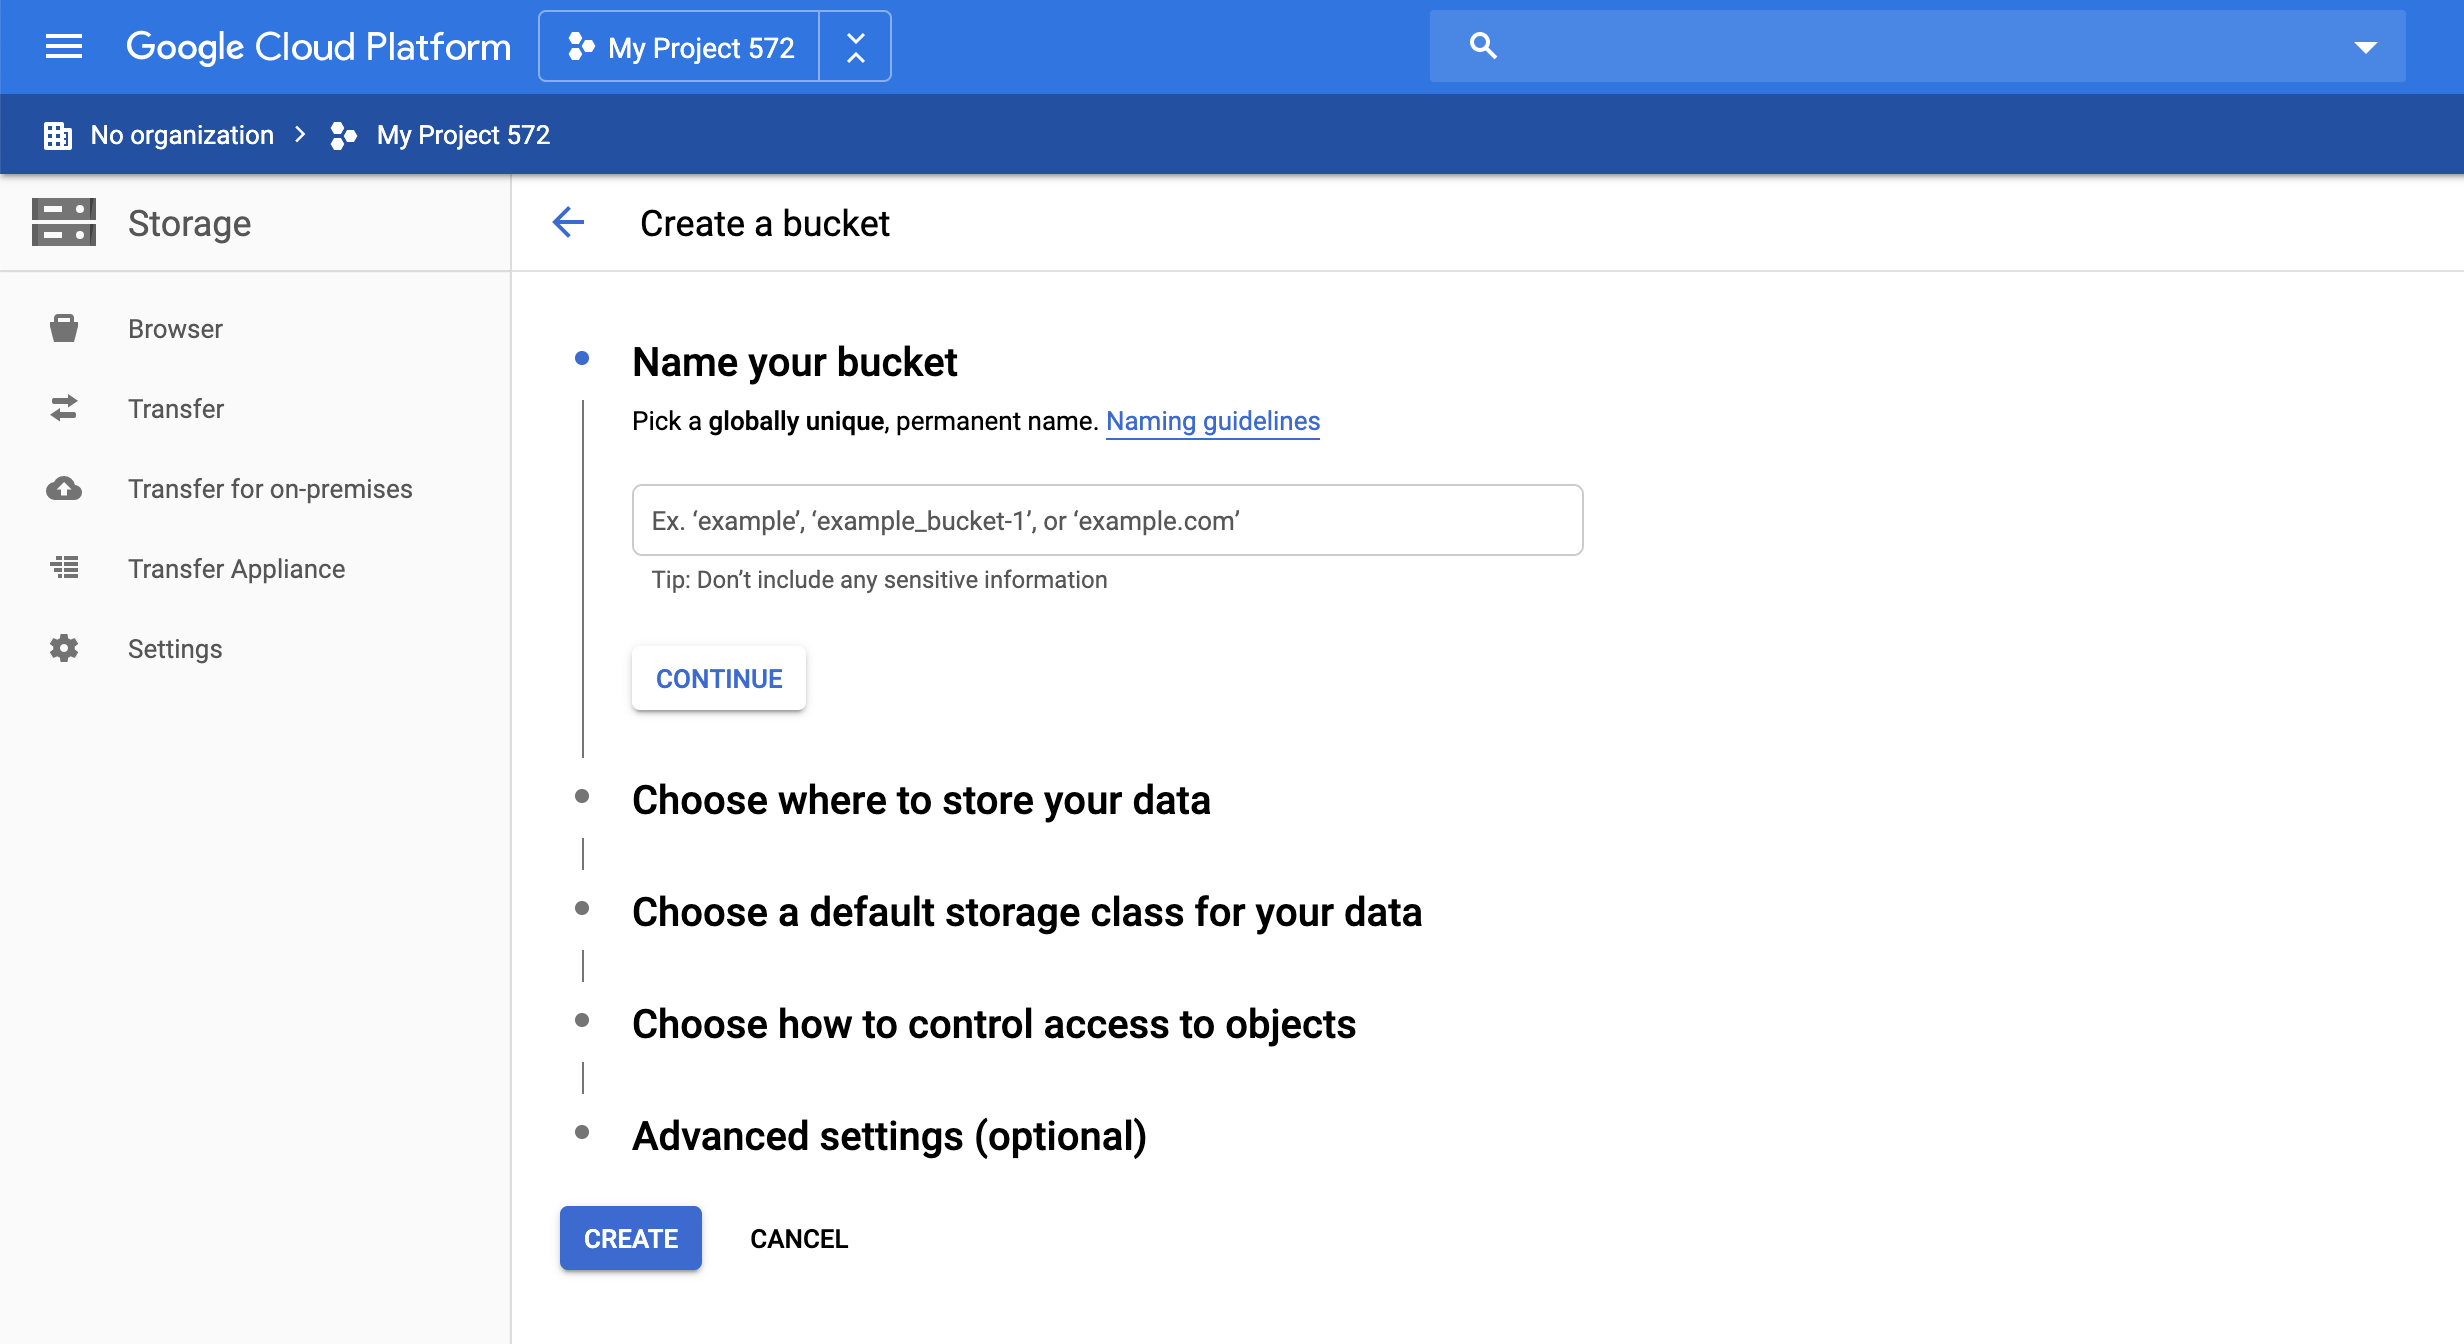
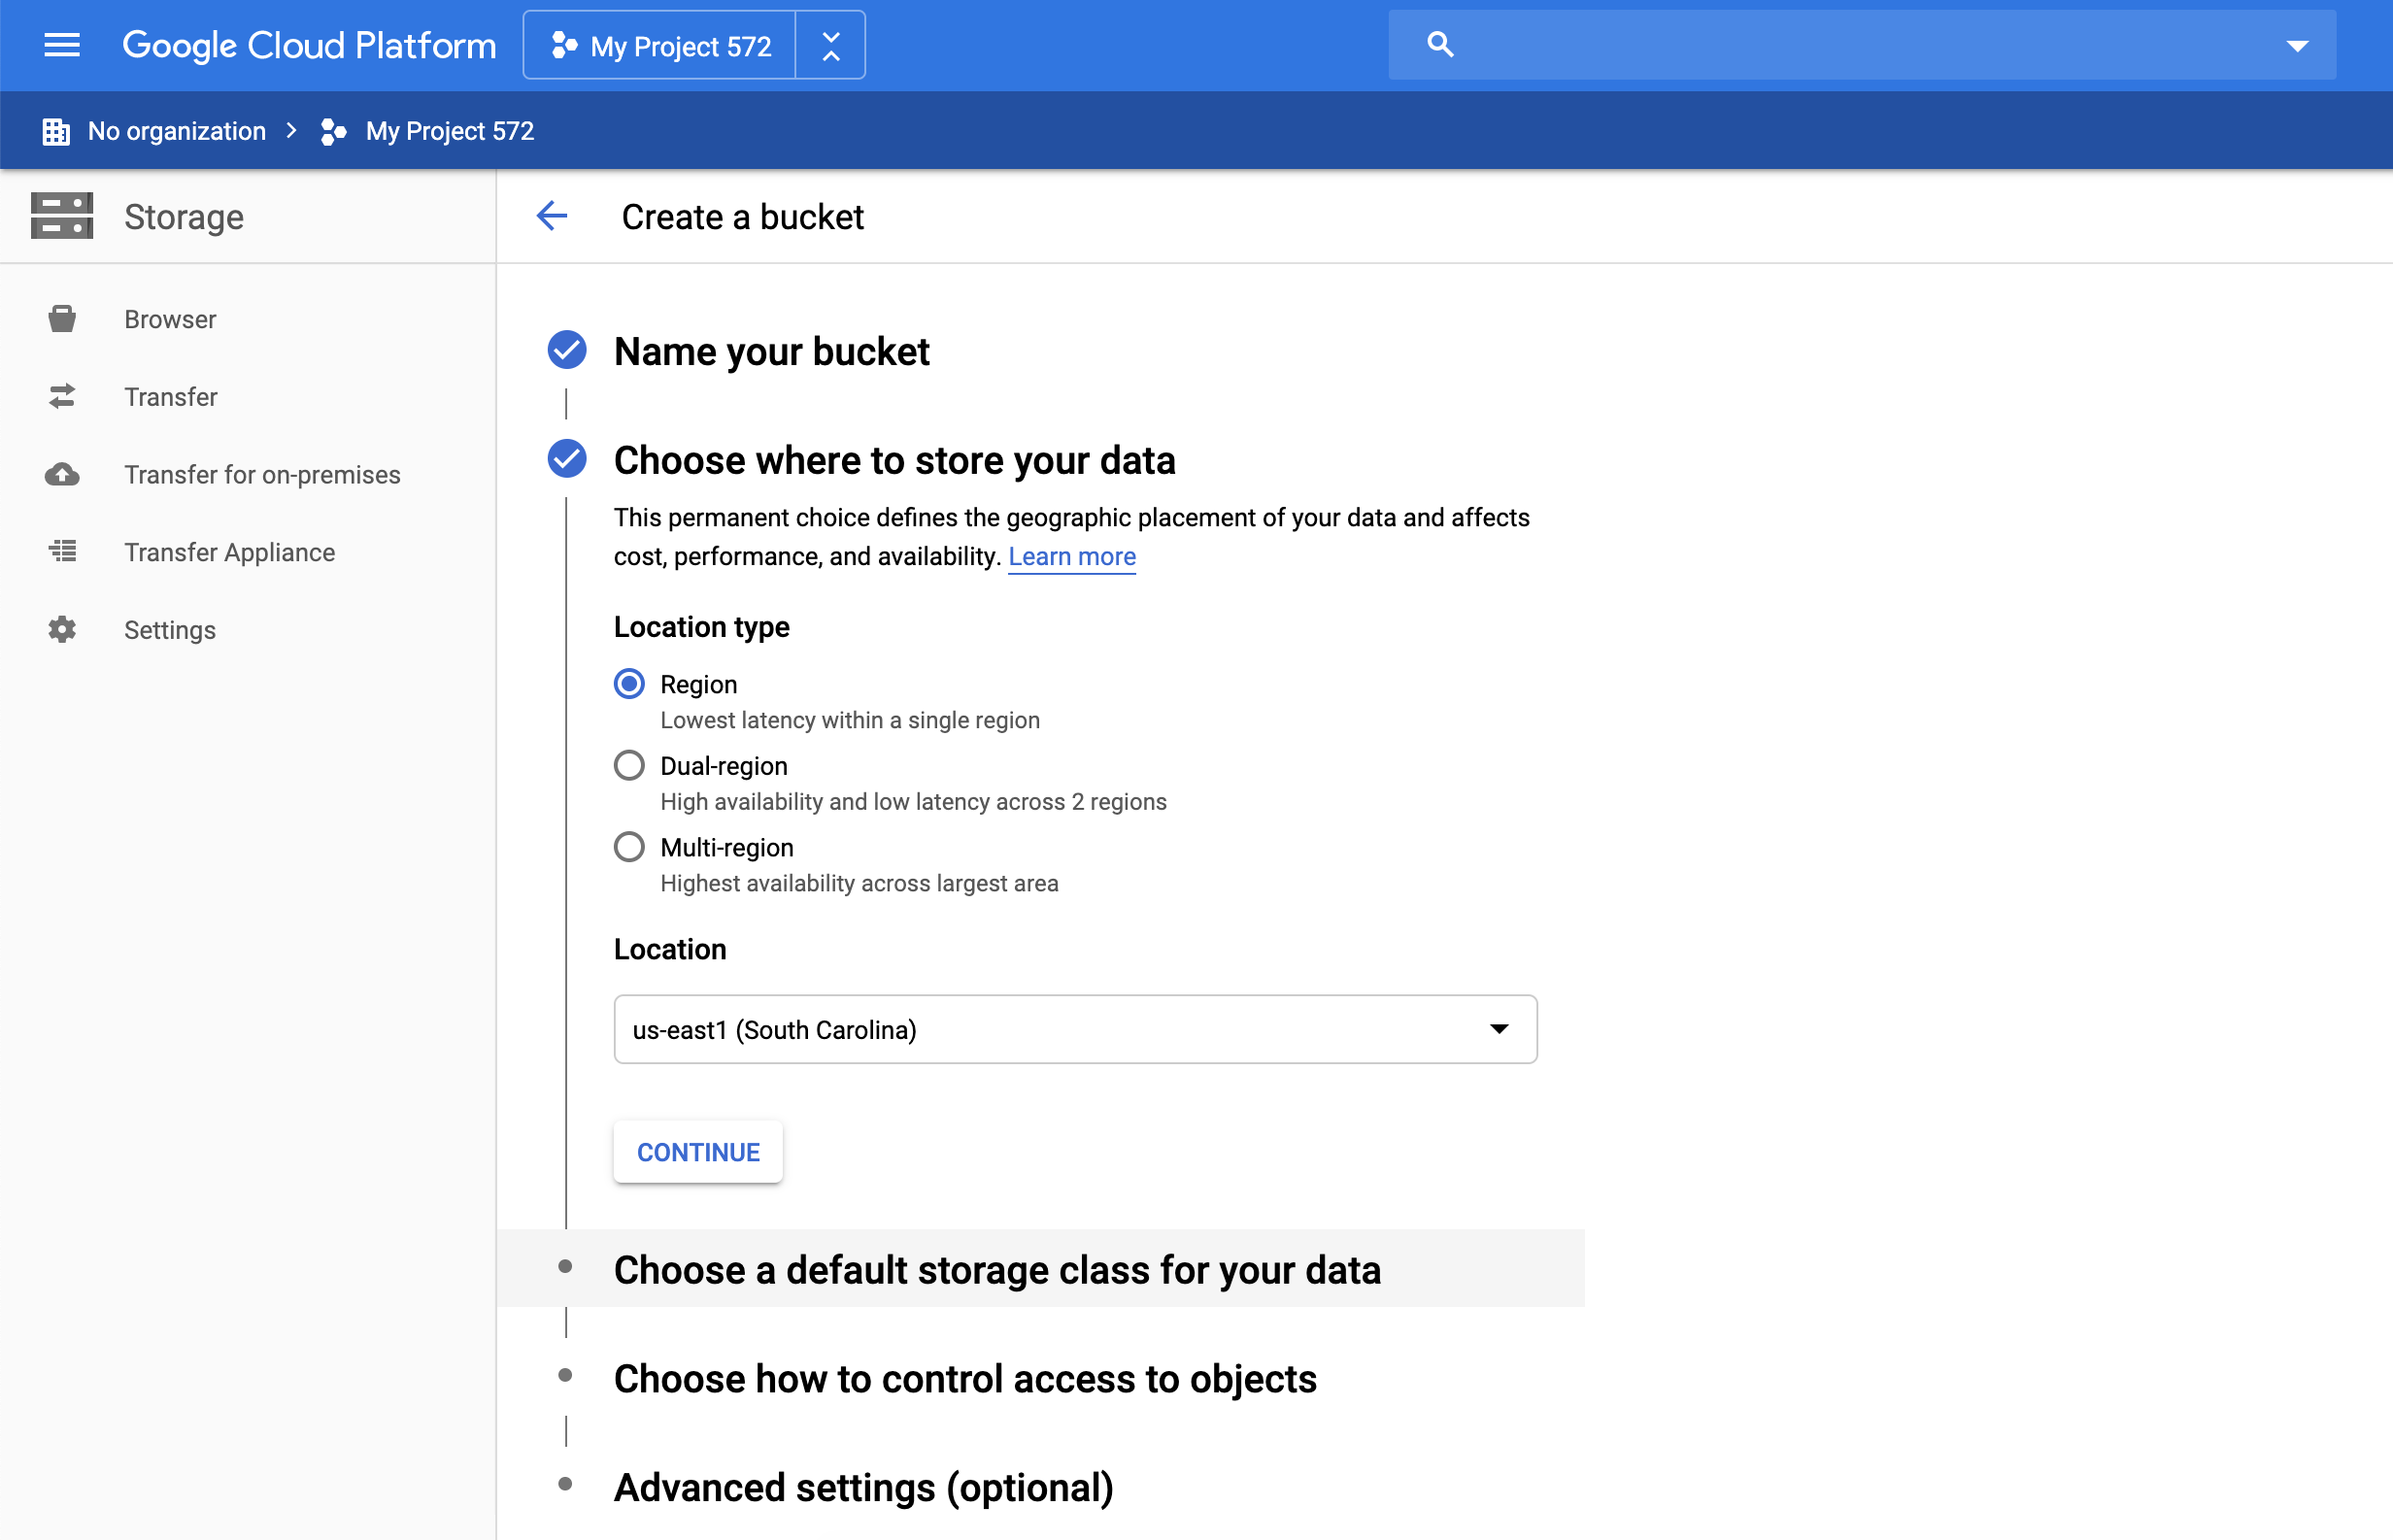
Give the bucket a name, then choose where to store your data. You have 3 choices here:
- Region: data is stored in one selected geographical location, lowest cost
- Dual-region: data is stored in 2 selected locations for higher availability and lower latency
- Multi-region: data is stored in multiple locations, highest availability and lower latency but higher cost
Pick the option that makes most sense for your use case.
Step 3 is setting storage class for your data. A storage class sets costs for storage, retrieval, and operations depending on how often you access your data. The more frequently the higher the cost. Leaving it at default setting of Standard works best for most use cases.
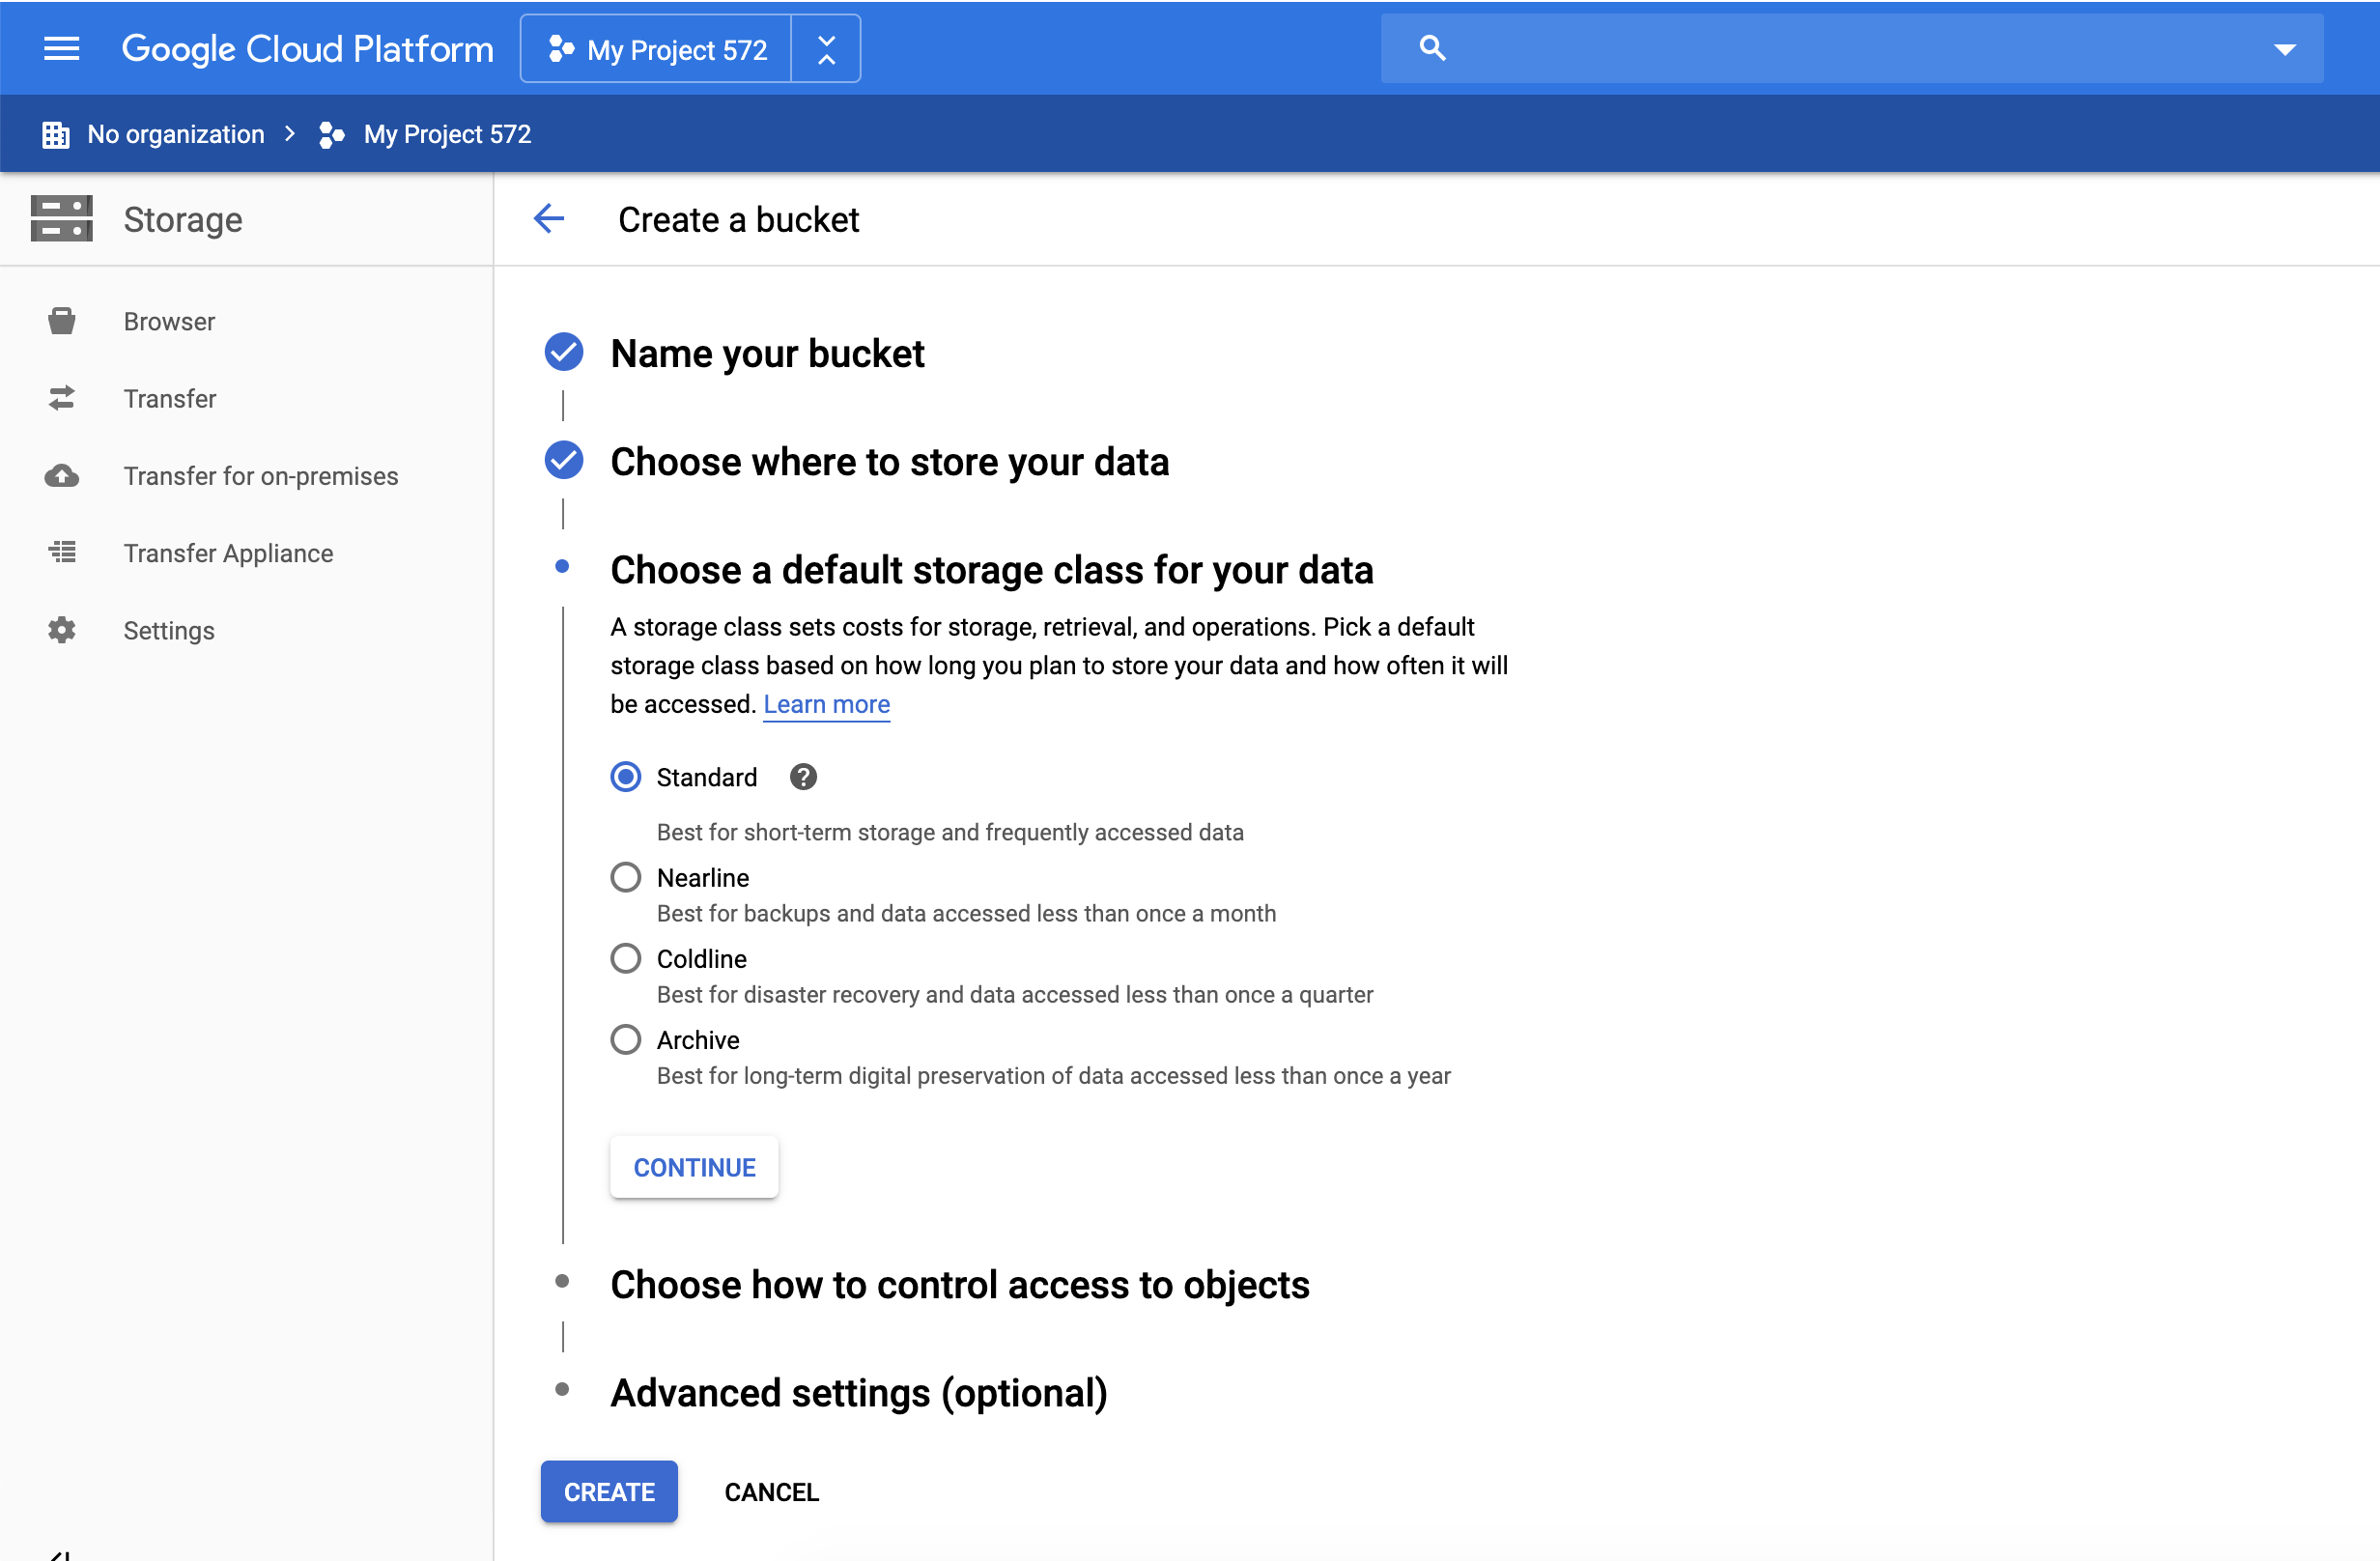
Click "Continue" to move on to access control configuration. Pick Fine-grained for access control
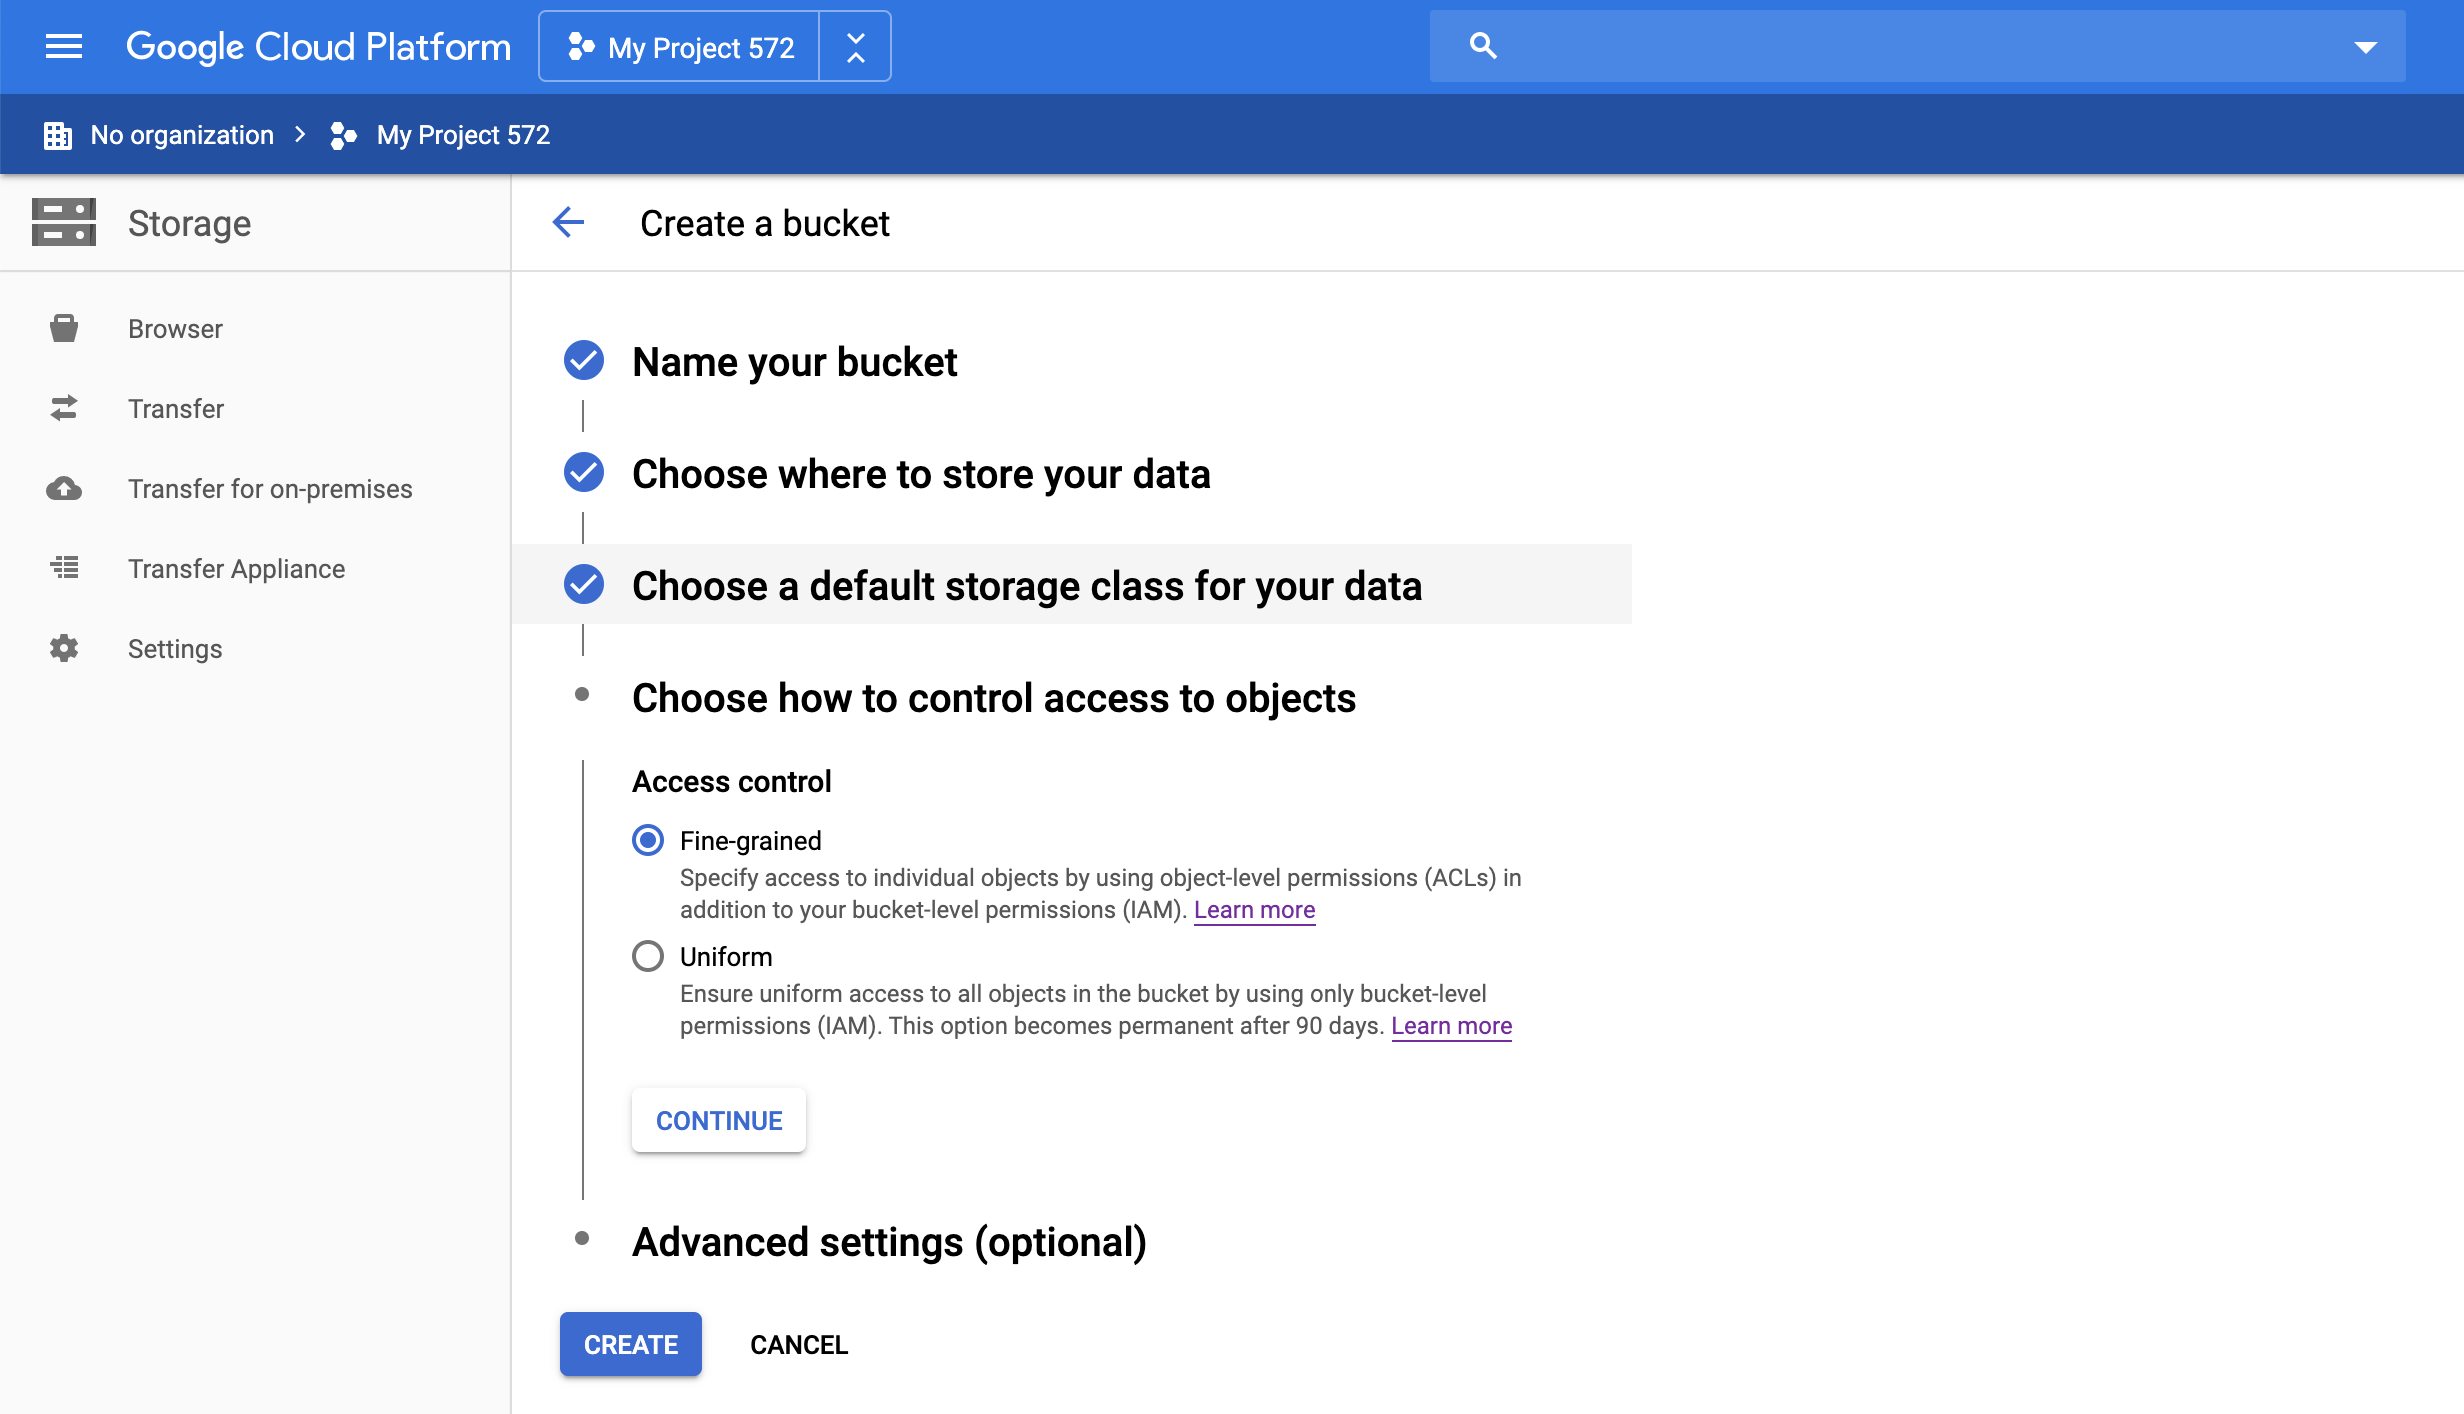
Click "Create" - you may ignore Advanced settings section for now - to finish creating the bucket. Let's have a look now on how to set permissions for it and obtain Access Key and Secret required to add it to Telestream Cloud.
Granting access in setting permissions
We strongly recommend to create specific Google Service Account that will have access only to this bucket instead of using your main (owner) account. Such account will have its own pair of Access Key and Secret that you can use to grant us access to the bucket.
Creating Service Account
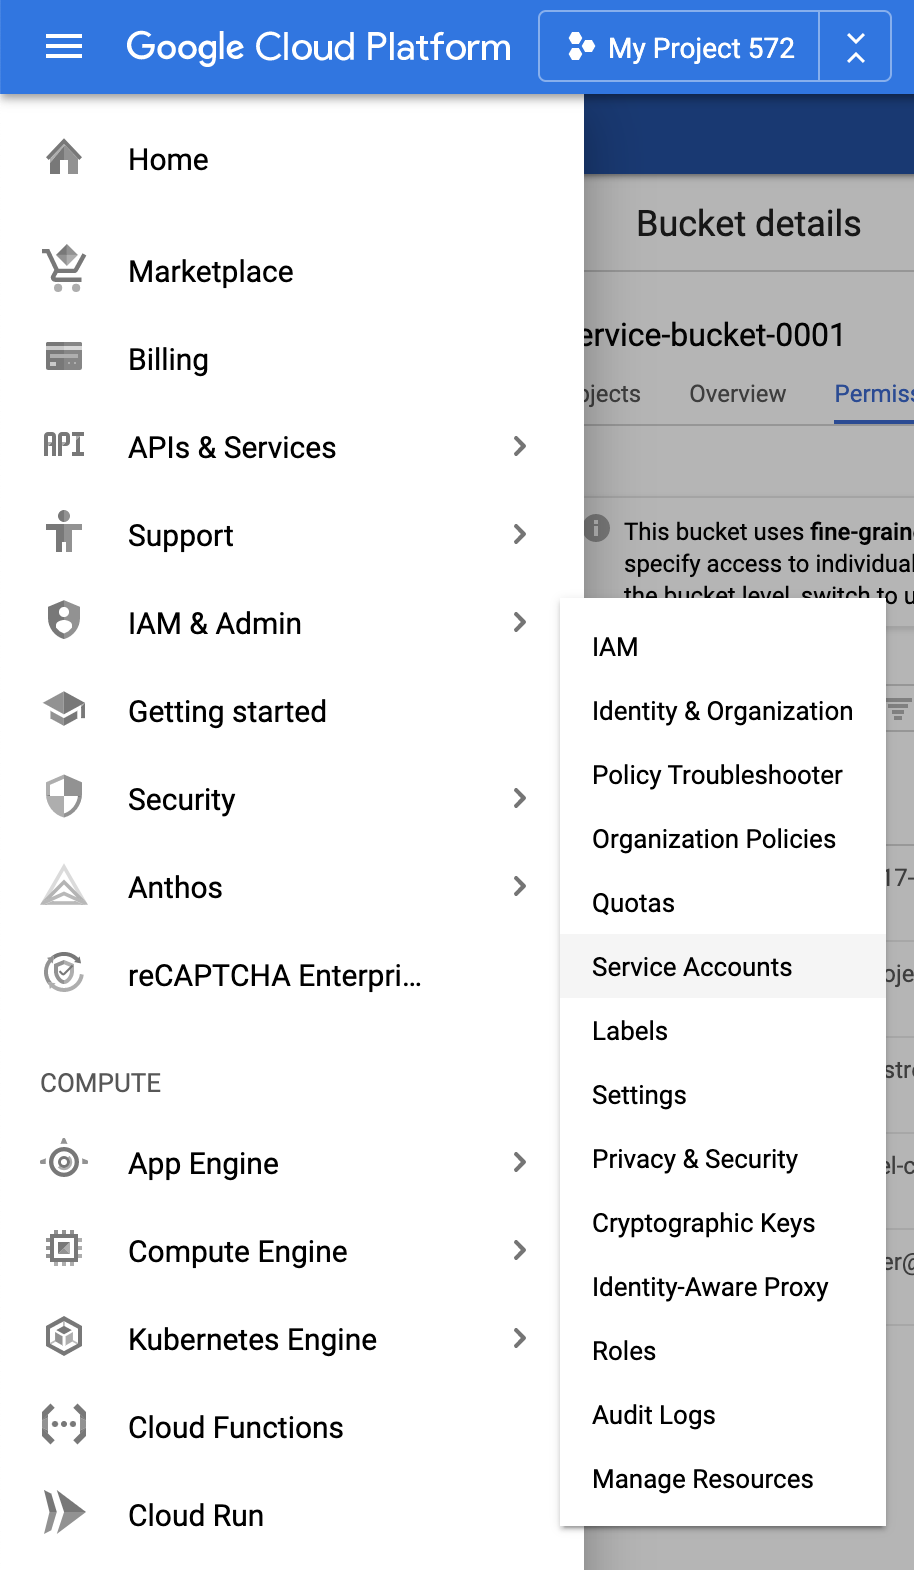
When logged-in to your Google Cloud console and from left side menu select IAM & Admin > Service Accounts and click "Create Service Account".
Give it a meaningful name and copy created Service account ID. You will need it later when assigning this service account with your bucket.
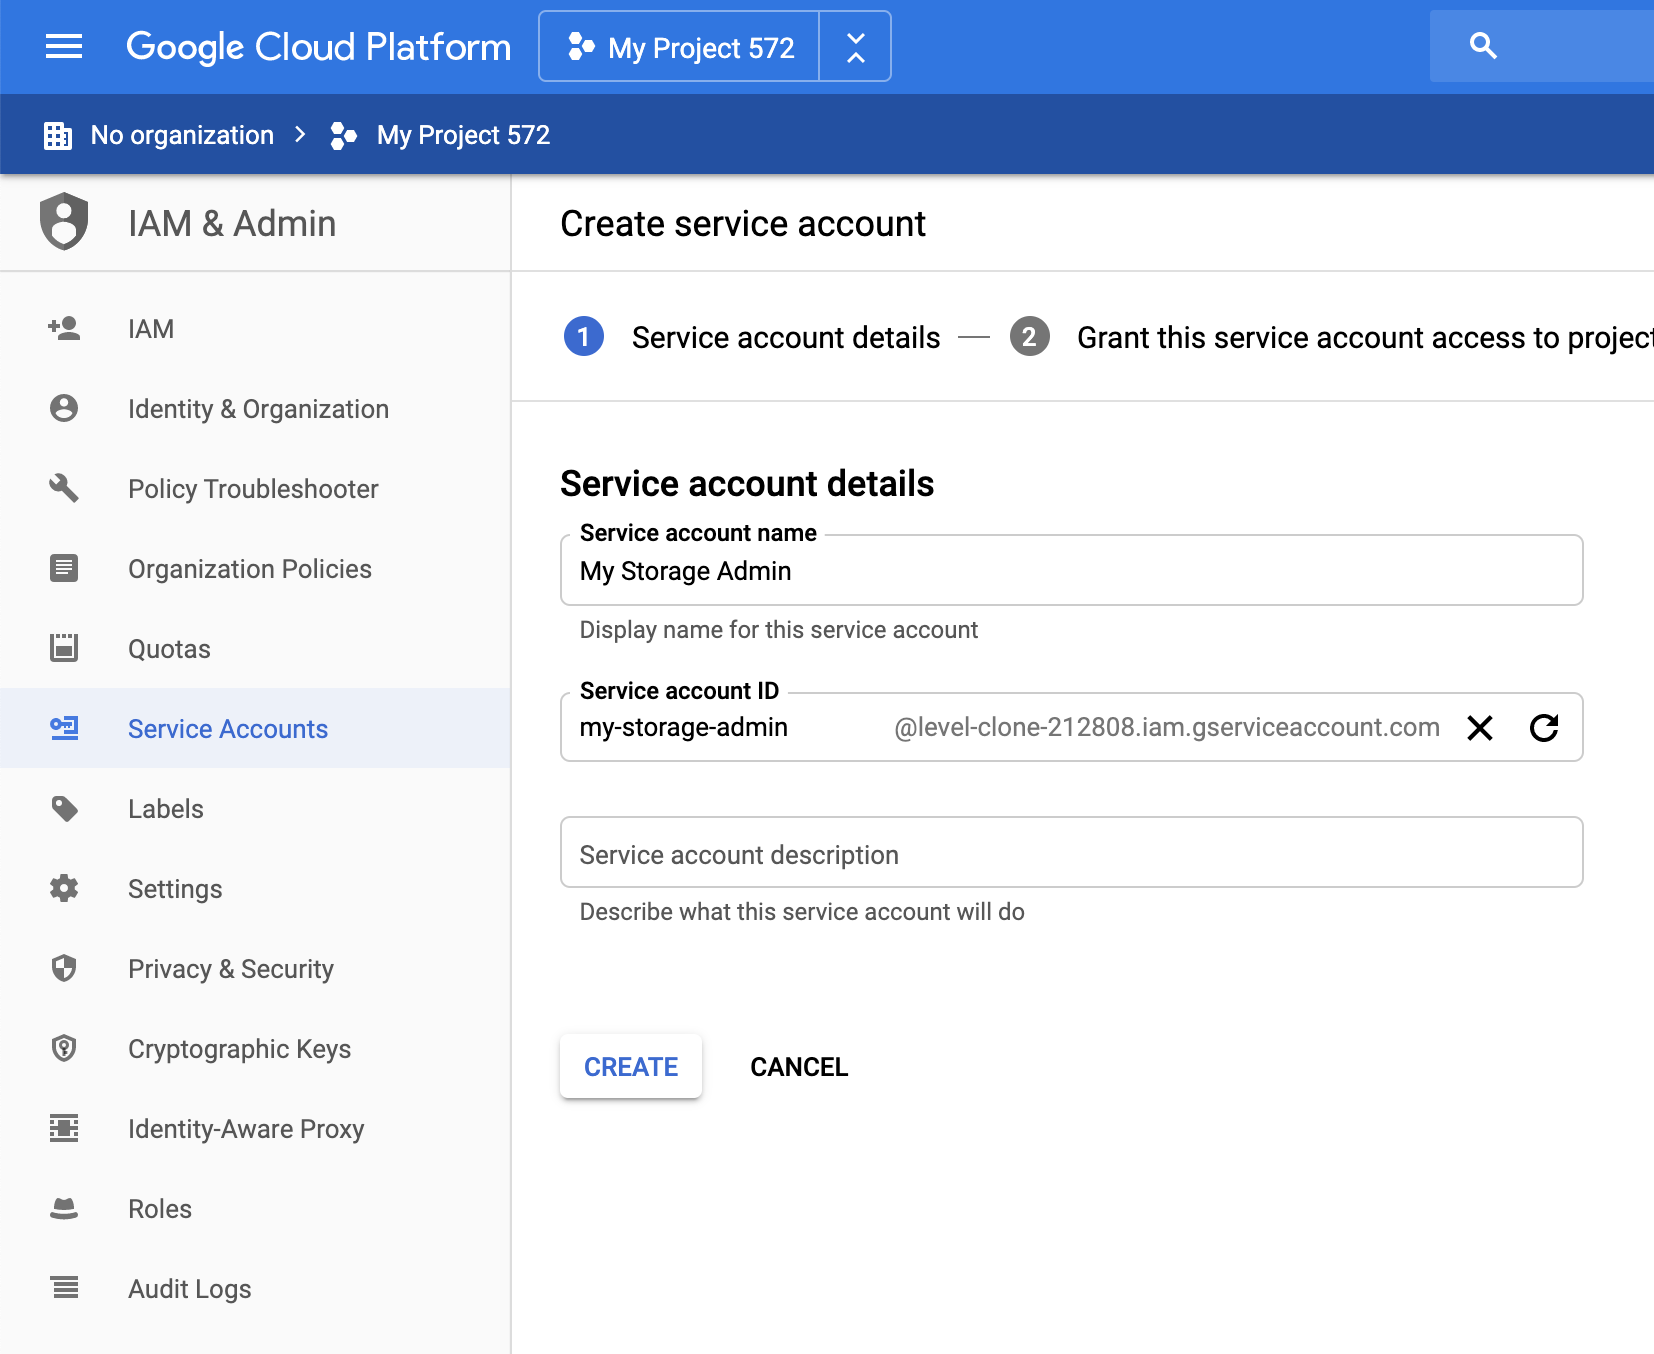
You can ignore next 2 steps, as they are optional. Click "Done" and your new Service Account should be created and visible on the list.

Assigning Service Account to your bucket
Go back to Storage Browser and click on the name of the bucket you would like to use.

You will now see bucket properties grouped in 4 tabs. Go to Permissions tab. This is where all users and service accounts that have access to the bucket are visible.
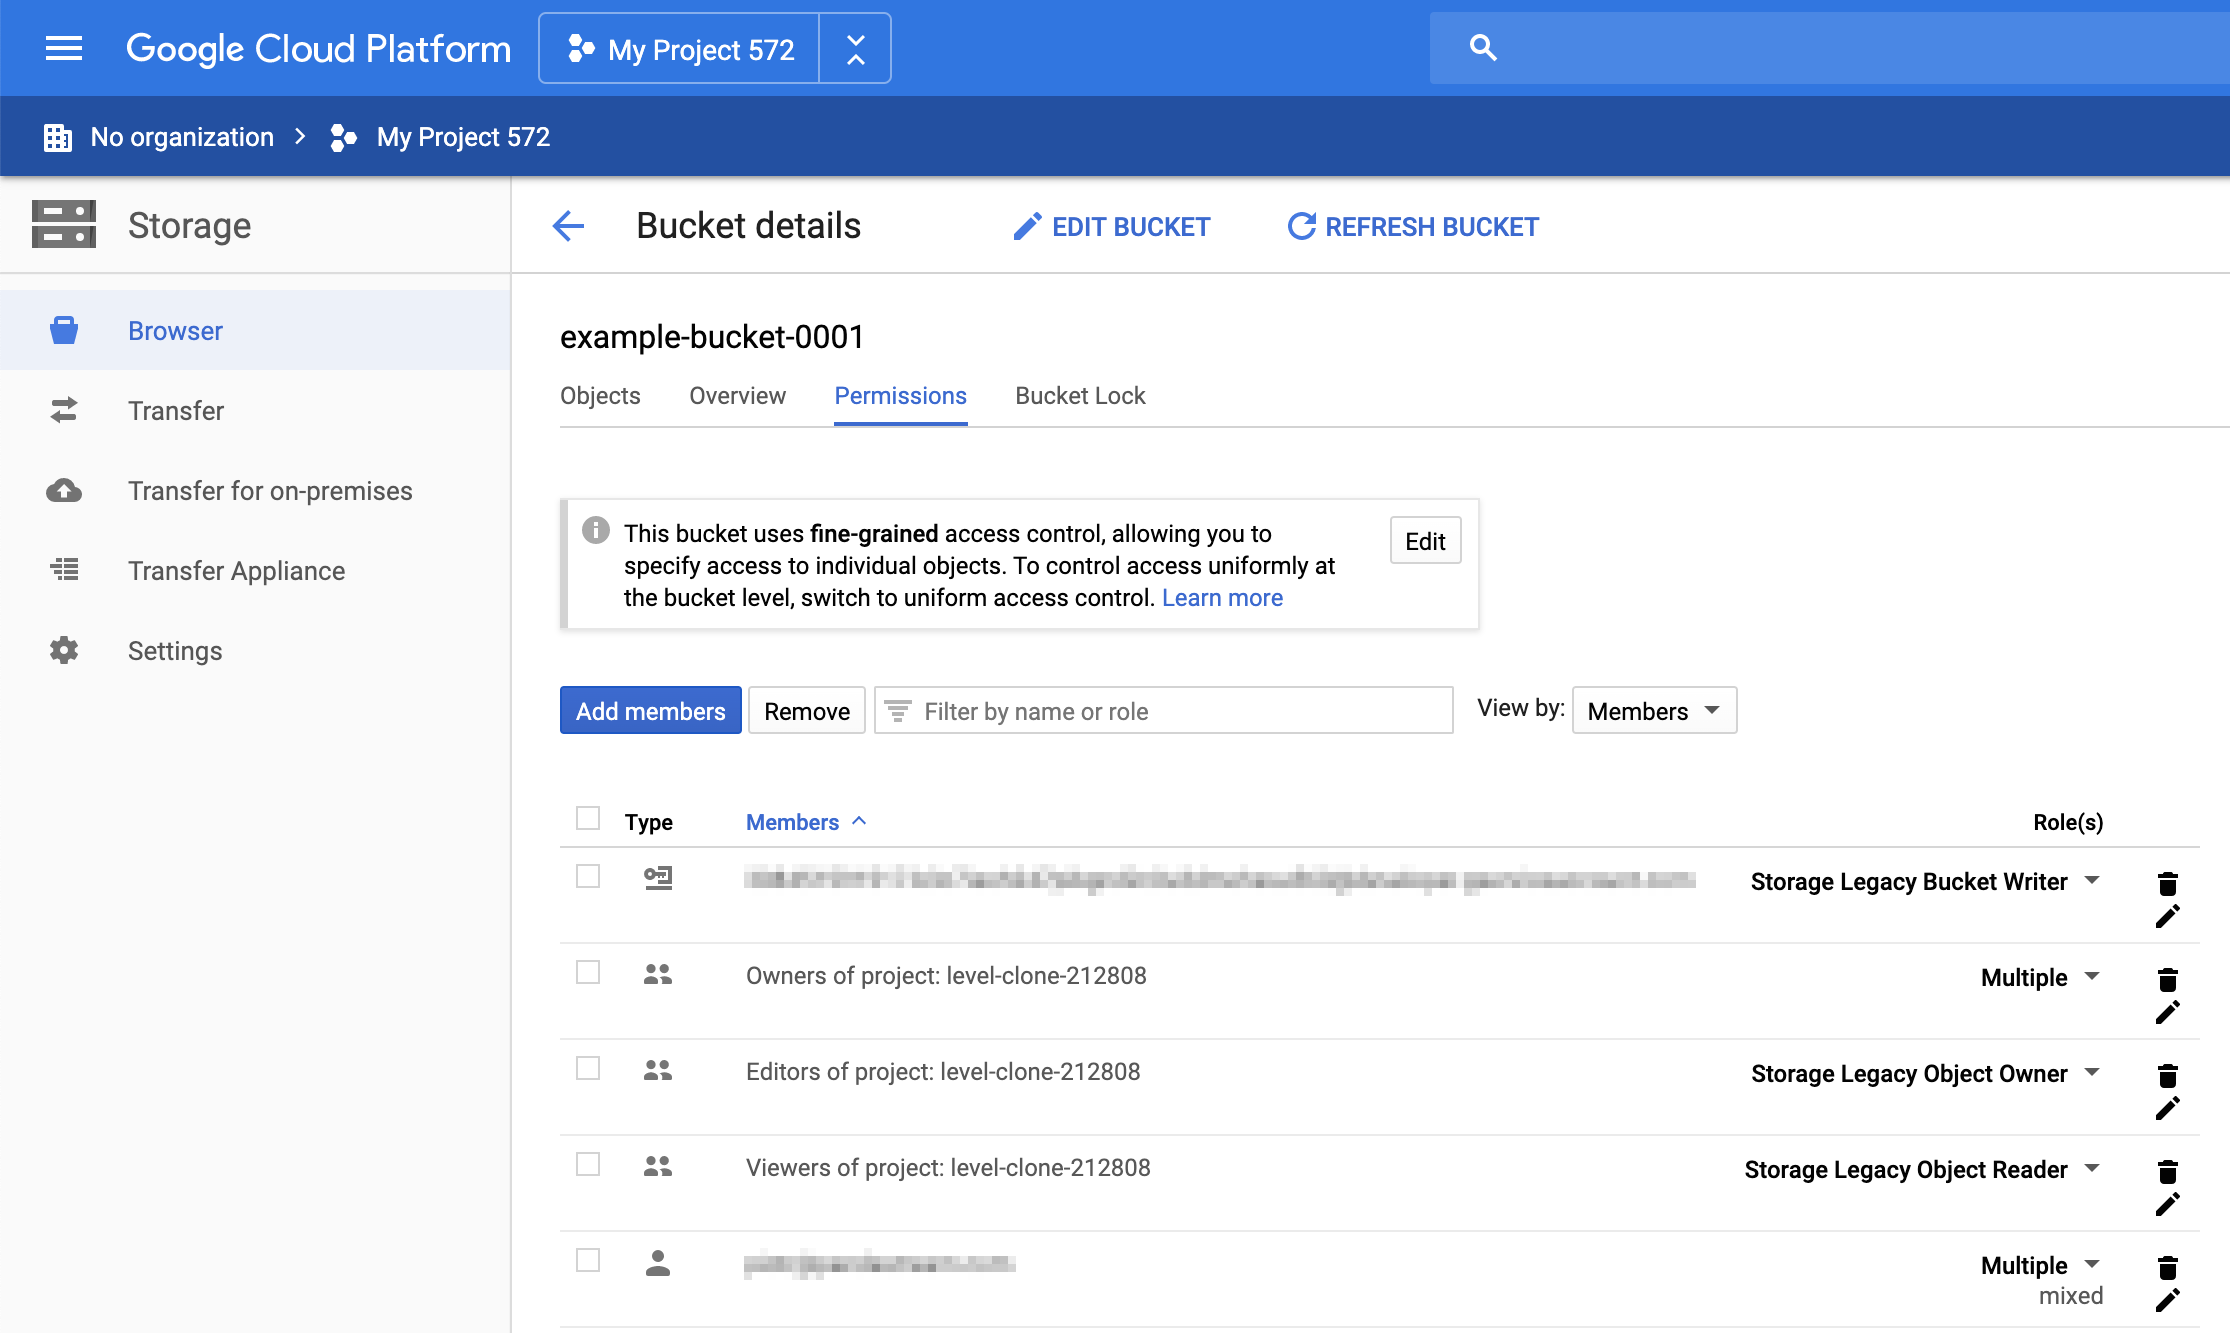
Click Add members and in config form paste the Service account ID and select role - Storage Admin. This will grant the service account full access to this bucket and its objects. Click Save.
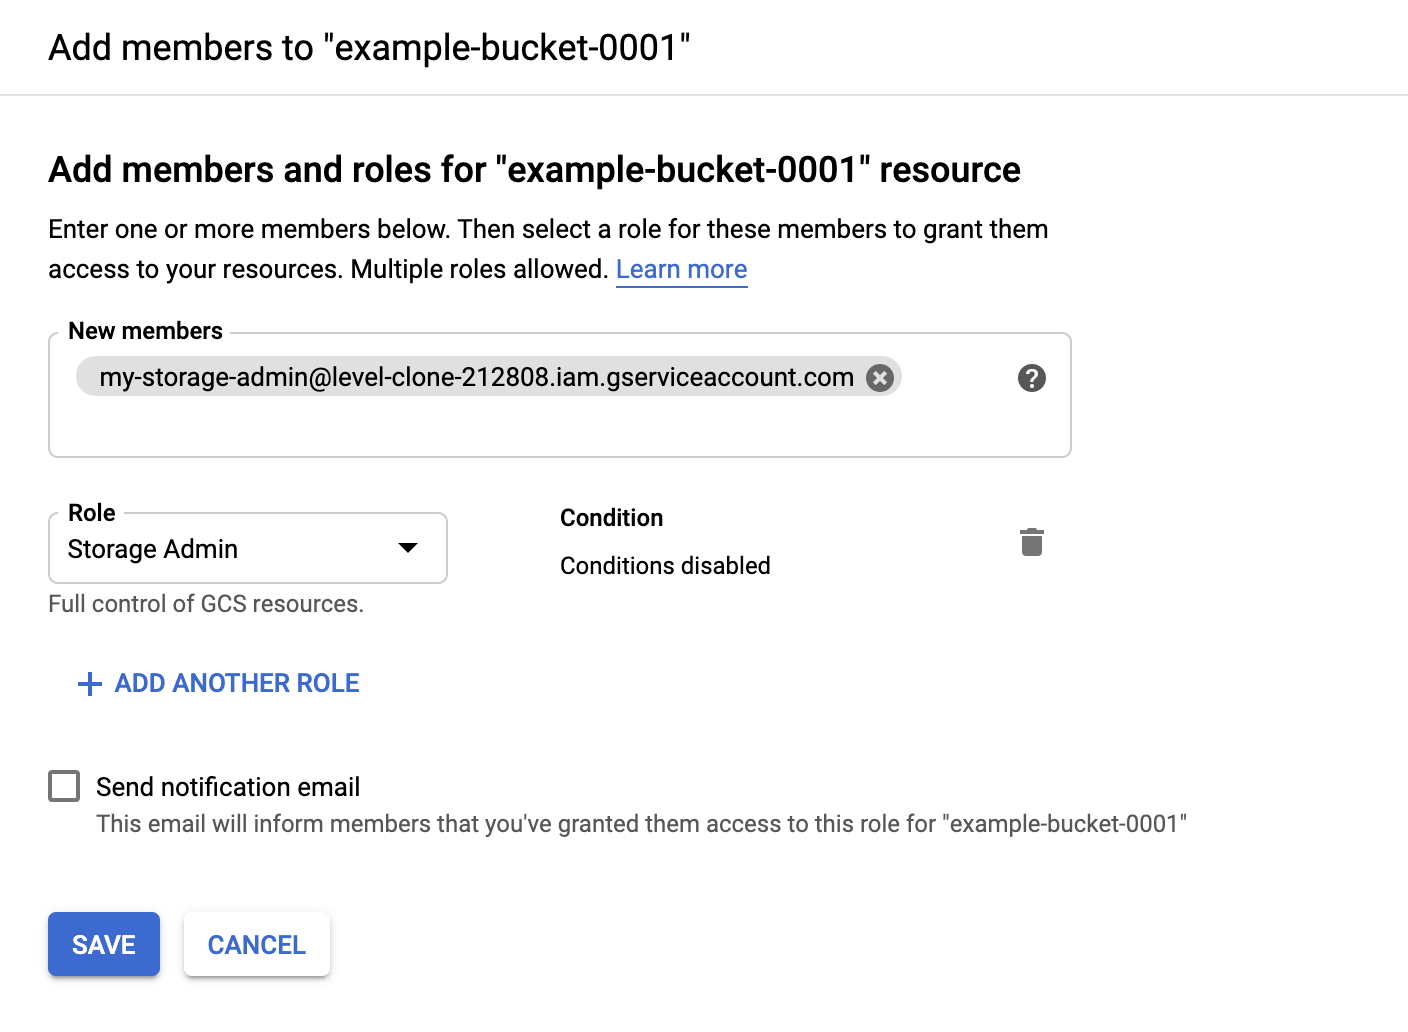
Generating access keys
Now, from left side menu in Google Console go to Storage > Settings and choose Interoperability tab. This is where you will generate Access Key and Secret for this service account that will be needed to add it to Telestream Cloud.
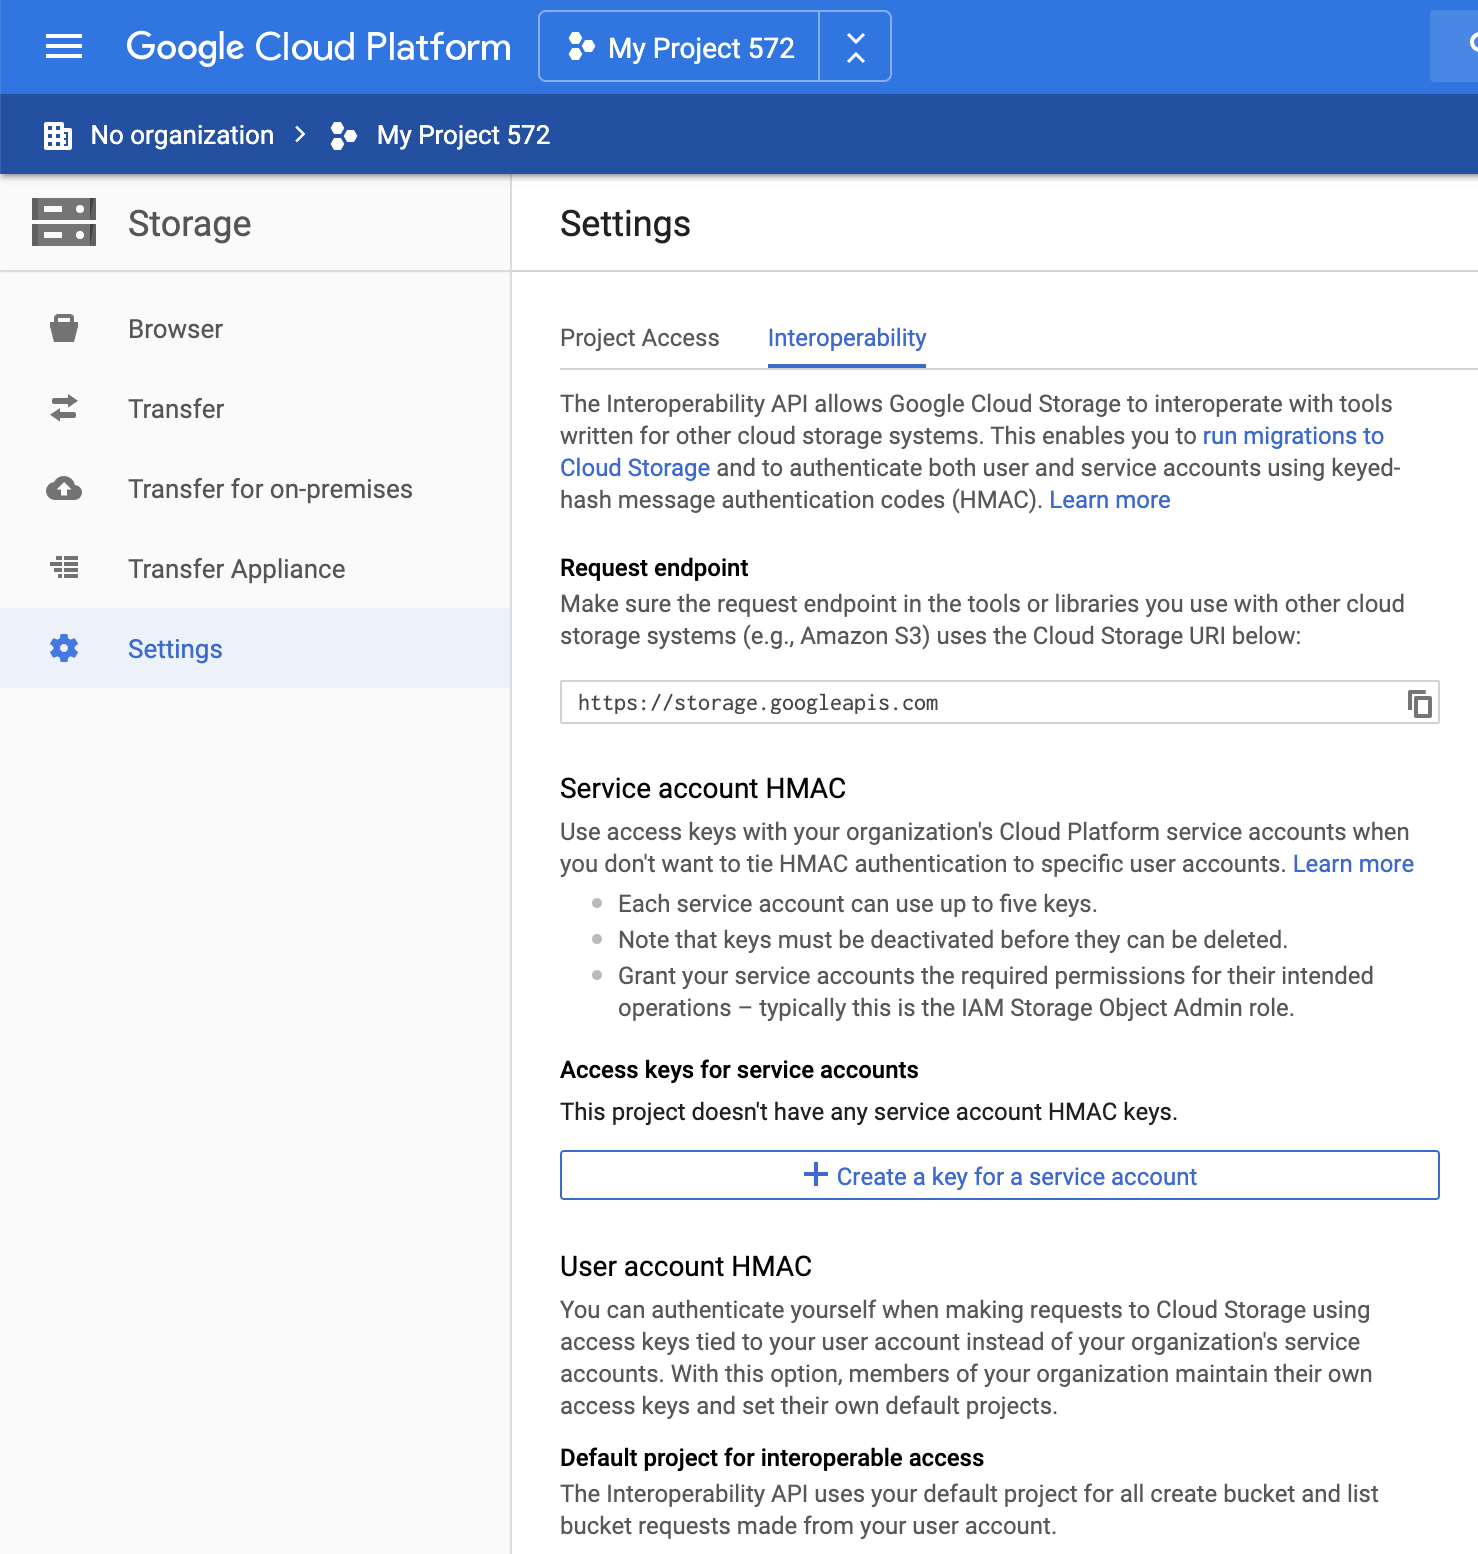
Click "Create a key for service account" and in the modal dialog select service account for which to generate keys and click "Create Key".
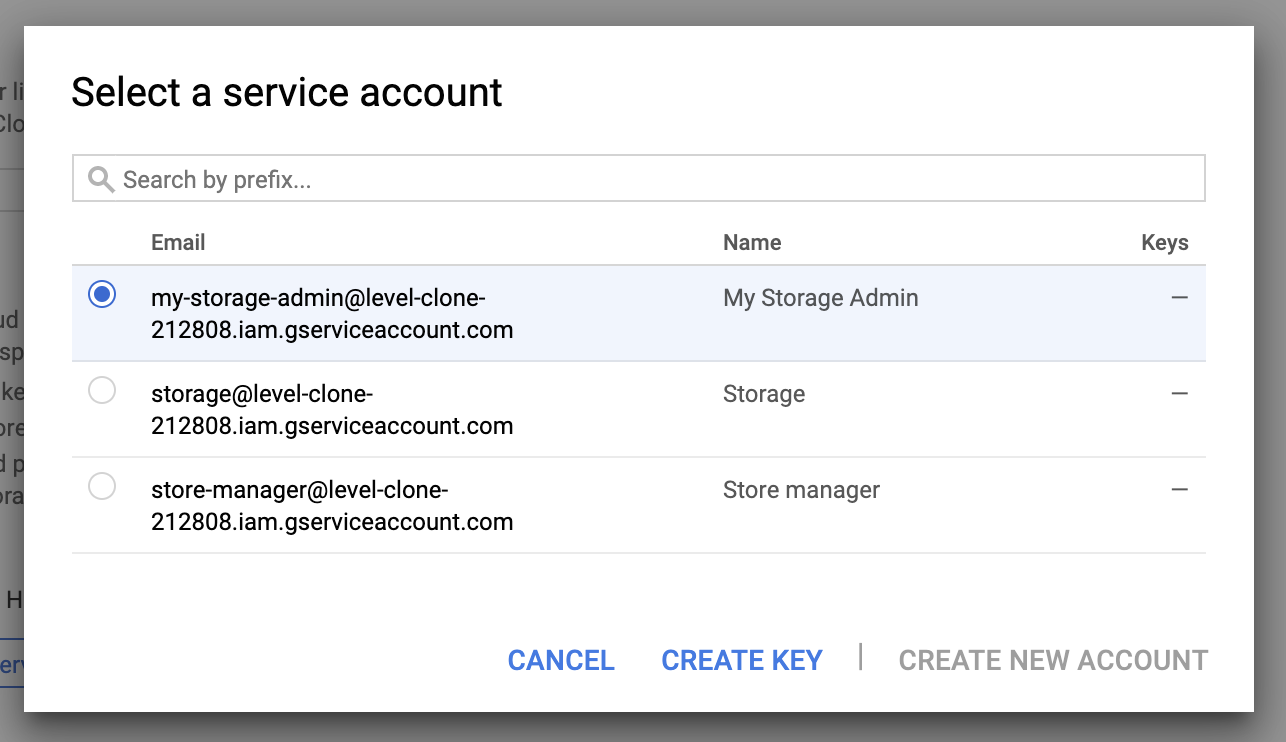
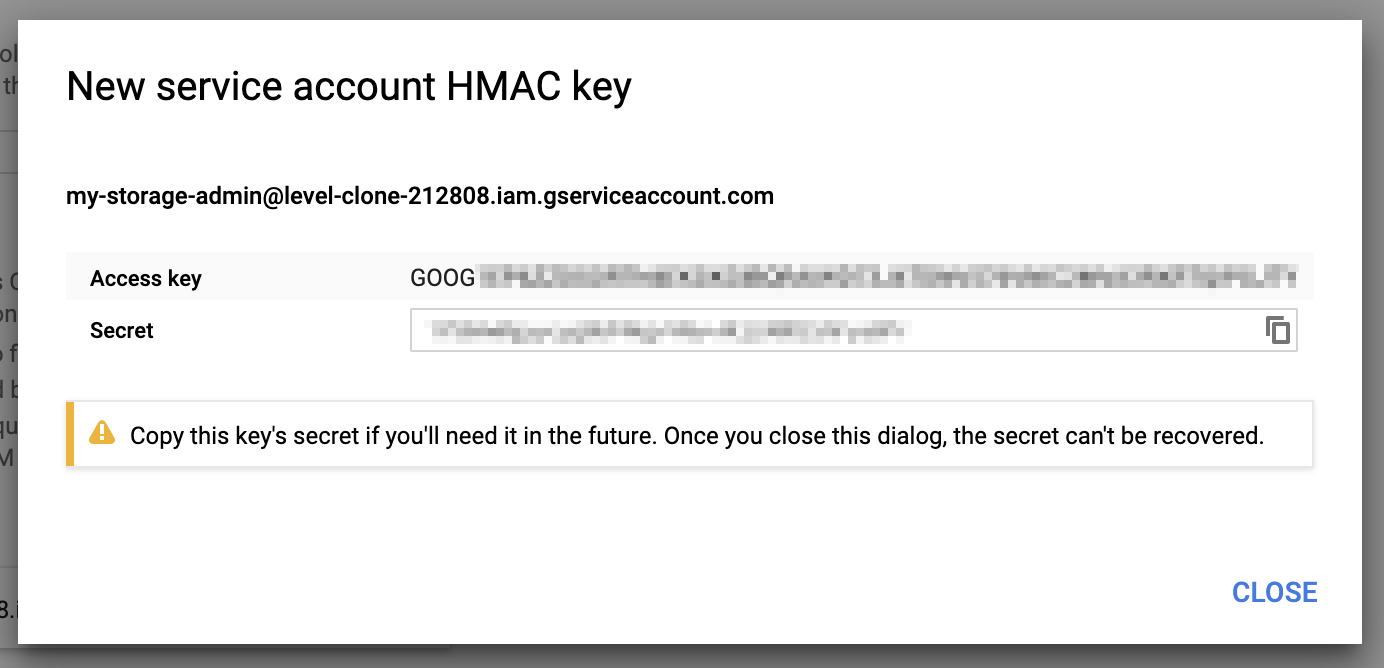
A unique pair of two keys - Access key and Secret will be created just for this Service Account. While you can always check Access Key in the web console, Secret will be shown only once in this dialog, so make sure you have it stored securely somewhere.
Now open new tab and log-in to your Telestream Cloud account.
Adding GCS bucket to Telestream Cloud
Go to Manage Stores in Telestream Cloud web console (top right menu) and Click Add Store. Select Google Cloud Storage and paste both keys in their respective fields and enter name of the bucket you wish to use.
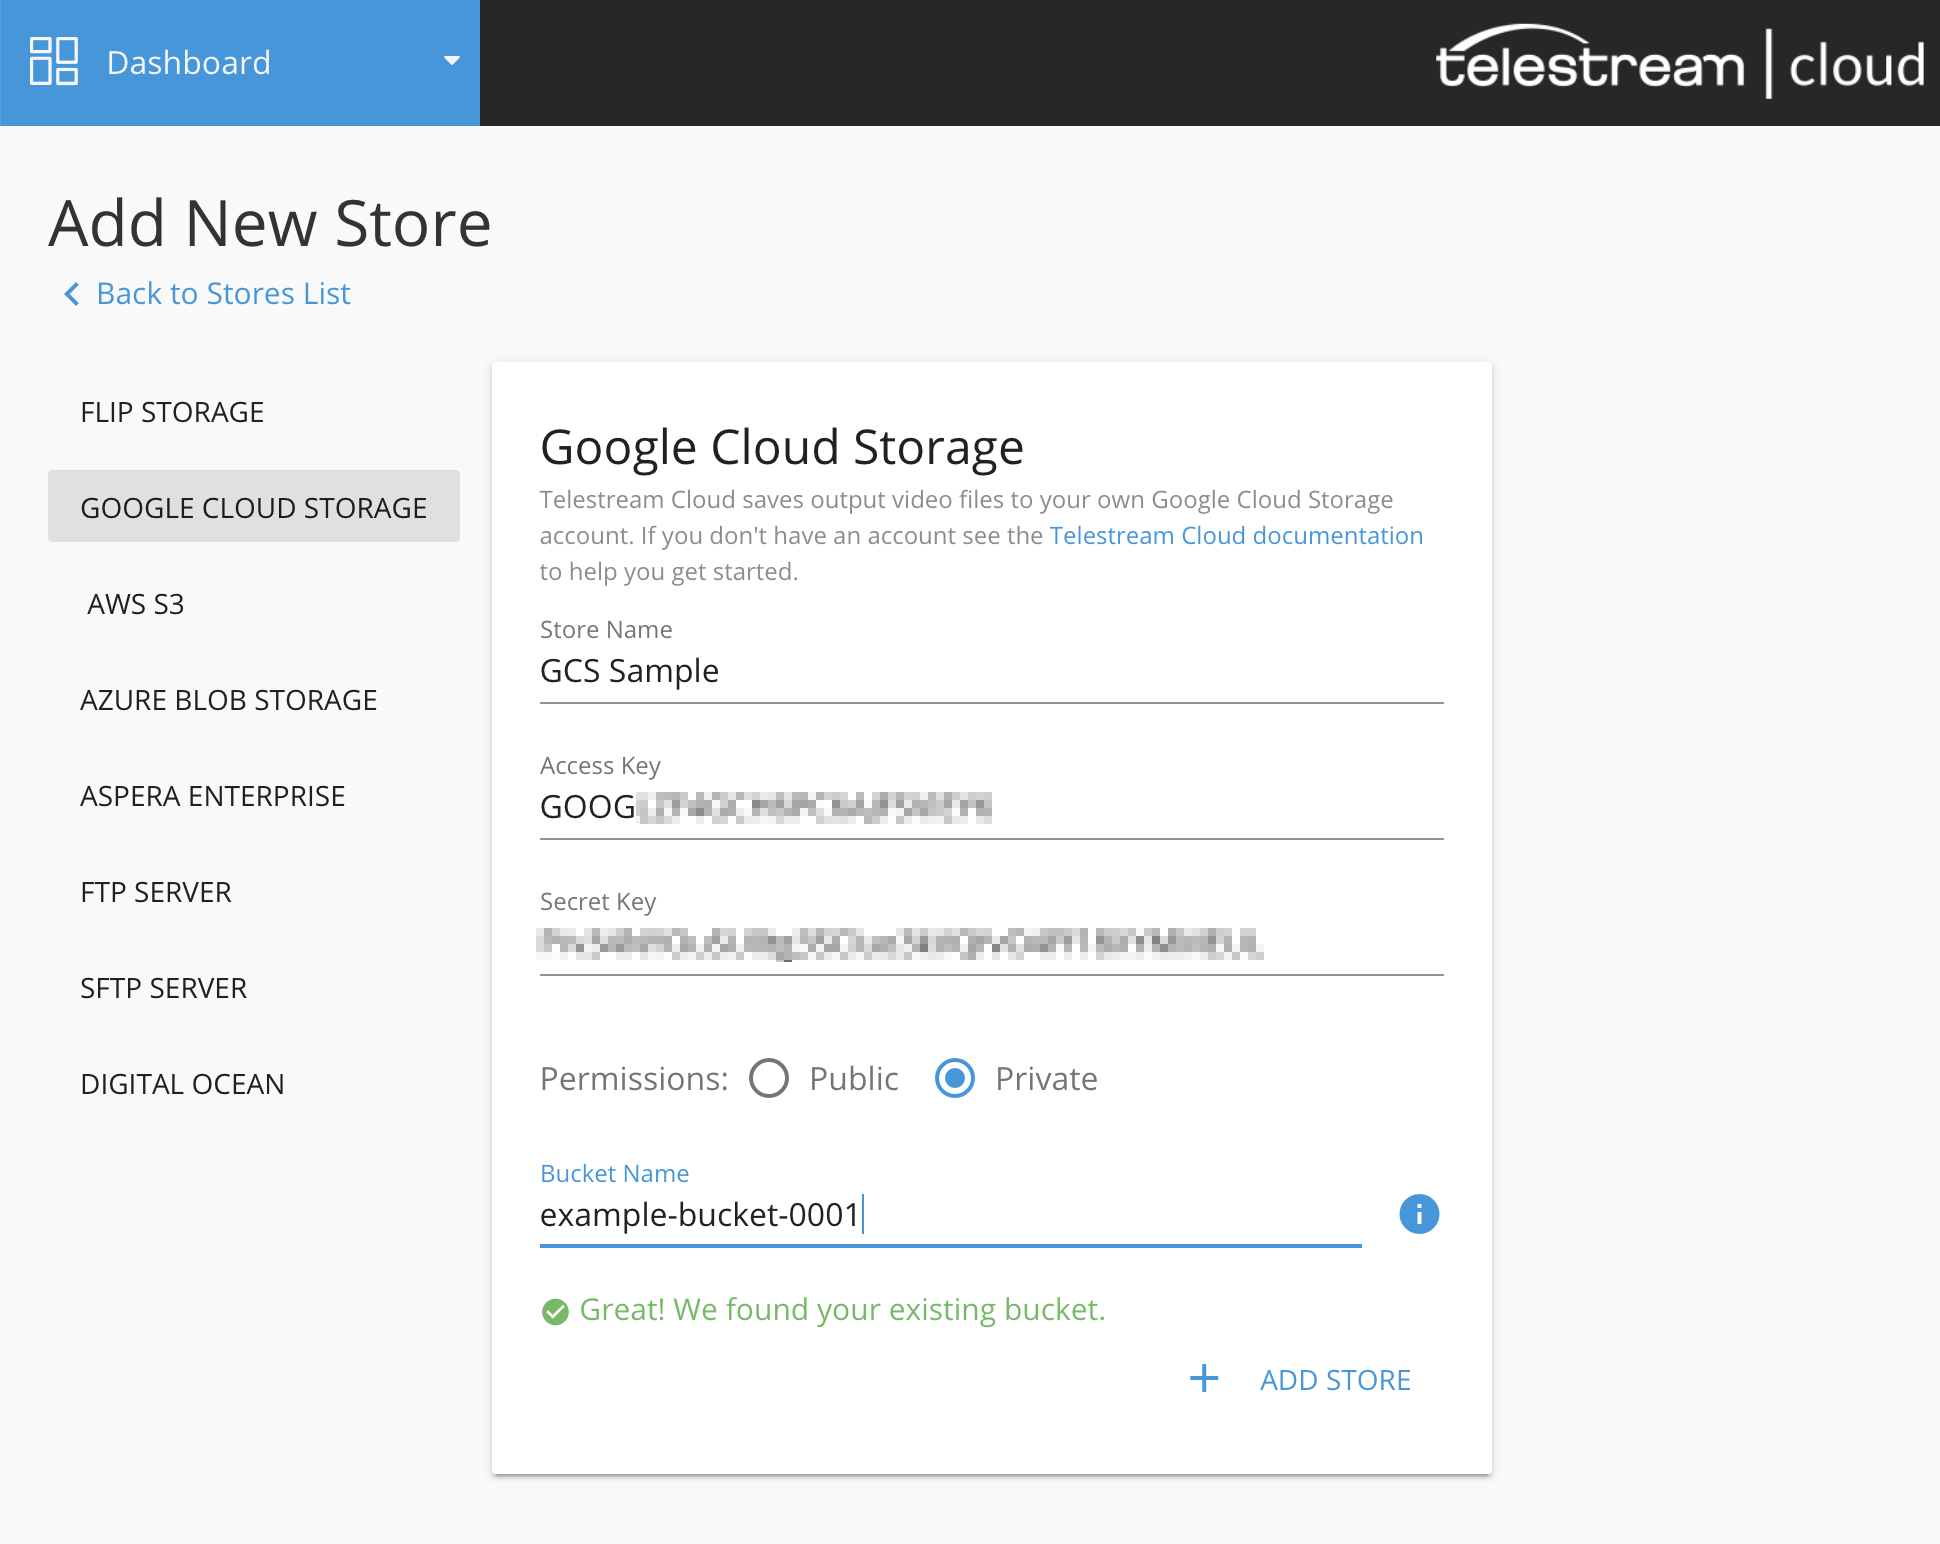
Click "Add Store" to finish. Your new GCS storage is ready to use.
Updated about 4 years ago
